Difference between revisions of "Badge Maker"
(Created page with " Equipment / Badge Maker <span style="color:red; font-size:+6em">Under Commissioning</span> = Summary = The badge maker makes badges. Currently, it can only make 6cm bad...") |
(→Using the Badge Maker) |
||
| Line 10: | Line 10: | ||
== Owners == | == Owners == | ||
| + | * | ||
| + | * | ||
== Training == | == Training == | ||
| + | |||
| + | See owners for occasional demos. | ||
== Health and Safety == | == Health and Safety == | ||
== Instructions == | == Instructions == | ||
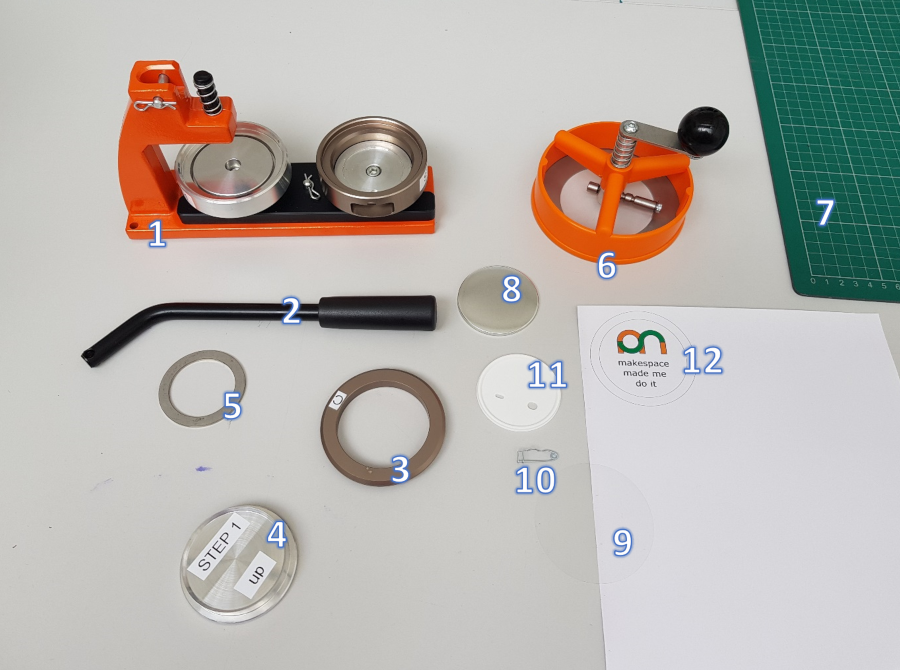
| + | You will need: | ||
| + | # Badge maker | ||
| + | # Handle | ||
| + | # Grey Ring C | ||
| + | # Centre Punch | ||
| + | # Metal ring | ||
| + | # Cutter | ||
| + | # Cutting mat | ||
| + | # Badge Front | ||
| + | # Clear Plastic Disc | ||
| + | # Pin | ||
| + | # Badge Back | ||
| + | # Artwork (see useful files section below for template) | ||
| + | |||
| + | [[File:bm1.PNG]] | ||
| + | |||
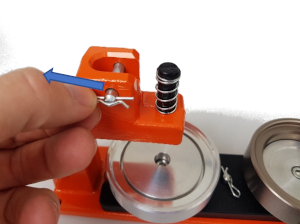
| + | === Assemble the press === | ||
| + | [[File:bm2.PNG]] | ||
| + | |||
| + | Remove clip | ||
| + | |||
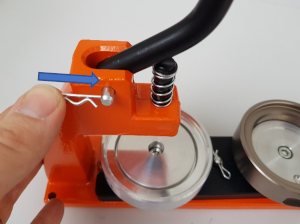
| + | [[File:bm3.PNG]] | ||
| + | |||
| + | Insert handle | ||
| + | |||
| + | Insert clip | ||
| + | |||
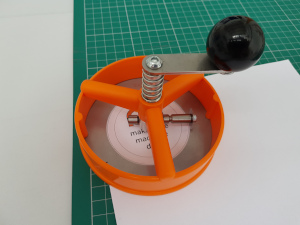
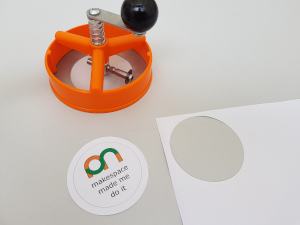
| + | === Cut out the artwork === | ||
| + | [[File:bm4.jpg]] | ||
| + | |||
| + | Use a cutting mat to protect desk | ||
| + | |||
| + | Align cutter over artwork | ||
| + | |||
| + | Turn Handle | ||
| + | |||
| + | [[File:bm5.jpg]] | ||
| + | |||
| + | === Step 1 === | ||
| + | [[File:bm6.jpg]] | ||
| + | |||
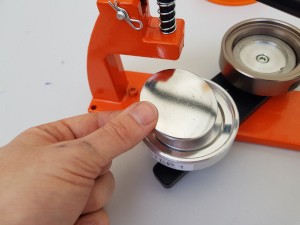
| + | Put metal badge front into die A | ||
| + | |||
| + | [[File:bm7.jpg]] | ||
| + | |||
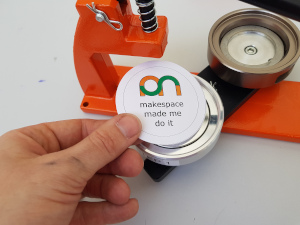
| + | Put artwork on top of metal badge front | ||
| + | |||
| + | [[File:bm8.jpg]] | ||
| + | |||
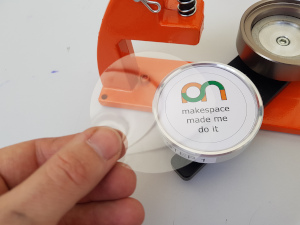
| + | Put clear plastic disc on top of artwork | ||
| + | |||
| + | [[File:bm9.jpg]] | ||
| + | |||
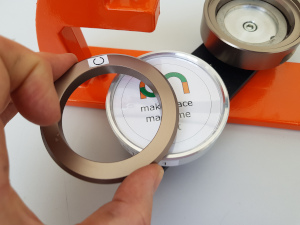
| + | Put grey ring C on top of plastic disc | ||
| + | |||
| + | [[File:bm10.jpg]] | ||
| + | |||
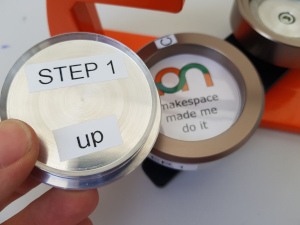
| + | Put centre punch on top | ||
| + | |||
| + | Make sure “step 1 up” stickers are facing up | ||
| + | |||
| + | [[File:bm11.jpg]] | ||
| + | |||
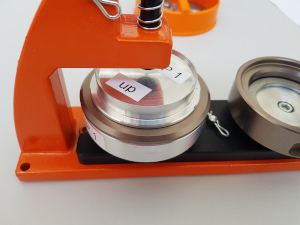
| + | Align the whole stack under the handle | ||
| + | |||
| + | [[File:bm12.PNG]] | ||
| + | |||
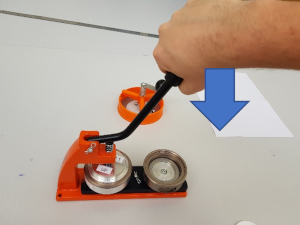
| + | Push down on handle | ||
| + | |||
| + | === Step 2 === | ||
| + | |||
| + | [[File:bm13.jpg]] | ||
| + | |||
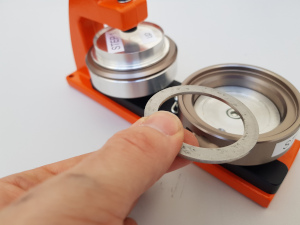
| + | Place metal ring in the bottom of die B | ||
| + | |||
| + | [[File:bm14.jpg]] | ||
| + | |||
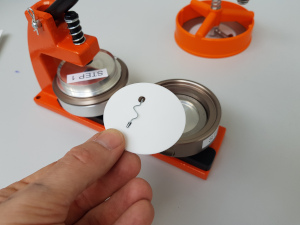
| + | Install pin into badge back | ||
| + | |||
| + | Put badge back into die B | ||
| + | |||
| + | Ensure “Z” of pin is facing up | ||
| + | |||
| + | [[File:bm15.jpg]] | ||
| + | |||
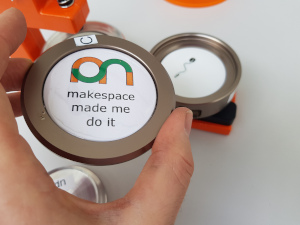
| + | Move ring C complete with badge front and artwork to die B | ||
| + | |||
| + | You may wish to consider the pin in relation to the artwork | ||
| + | |||
| + | [[File:bm16.jpg]] | ||
| + | |||
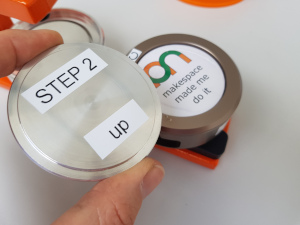
| + | Put centre punch on top | ||
| + | |||
| + | Make sure “step 2 up” stickers are facing up | ||
| + | |||
| + | [[File:bm17.jpg]] | ||
| + | |||
| + | Align the whole stack under the handle | ||
| + | |||
| + | [[File:bm18.PNG]] | ||
| + | |||
| + | Push down on handle | ||
| + | |||
| + | === Done === | ||
| + | [[File:bm19.jpg]] | ||
| − | + | Remove the finished badge and wear with pride! | |
== Useful Files== | == Useful Files== | ||
| + | * [[File:Badge_Maker_Instructions.pdf|Intruction Sheet]] | ||
* [[File:Badge_maker_template.zip|Badge Maker Template]] | * [[File:Badge_maker_template.zip|Badge Maker Template]] | ||
Revision as of 17:59, 25 April 2019
Equipment / Badge Maker
Under Commissioning
Contents
Summary
The badge maker makes badges. Currently, it can only make 6cm badges.
Using the Badge Maker
Owners
Training
See owners for occasional demos.
Health and Safety
Instructions
You will need:
- Badge maker
- Handle
- Grey Ring C
- Centre Punch
- Metal ring
- Cutter
- Cutting mat
- Badge Front
- Clear Plastic Disc
- Pin
- Badge Back
- Artwork (see useful files section below for template)
Assemble the press
Remove clip
Insert handle
Insert clip
Cut out the artwork
Use a cutting mat to protect desk
Align cutter over artwork
Turn Handle
Step 1
Put metal badge front into die A
Put artwork on top of metal badge front
Put clear plastic disc on top of artwork
Put grey ring C on top of plastic disc
Put centre punch on top
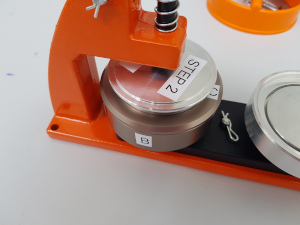
Make sure “step 1 up” stickers are facing up
Align the whole stack under the handle
Push down on handle
Step 2
Place metal ring in the bottom of die B
Install pin into badge back
Put badge back into die B
Ensure “Z” of pin is facing up
Move ring C complete with badge front and artwork to die B
You may wish to consider the pin in relation to the artwork
Put centre punch on top
Make sure “step 2 up” stickers are facing up
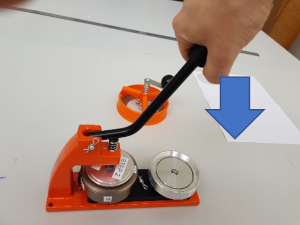
Align the whole stack under the handle
Push down on handle
Done
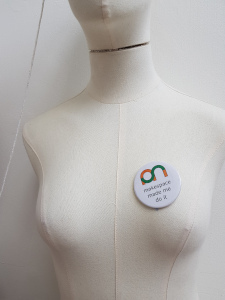
Remove the finished badge and wear with pride!
