Difference between revisions of "PCB milling"
| Line 14: | Line 14: | ||
== Export from Kicad == | == Export from Kicad == | ||
| + | |||
| + | Download the example Kicad project from FIXME, open "WS2812B_breakout.pro" using Kicad, and then open the PCB editor. You should be faced with a routed board, all ready to be exported. | ||
| + | [[Image:Initial_Kicad.png]] | ||
| + | [[ | ||
== Import into CopperCAM and milling setup == | == Import into CopperCAM and milling setup == | ||
Revision as of 11:10, 26 April 2014
This page is intended to contain instructions on milling PCBs using the Roland CNC Mill. It is still a work in progress.
- The Roland CNC Mill is class red equipment - you MUST NOT use it without specific training.
- The Roland's communal milling bits will be easily damaged by copper and fiberglass - do NOT use the communal milling bits! I will leave a tin of specific PCB milling bits near the machine, clearly labelled as such.
The toolchain described on this page is as follows:
- Design the PCB in Kicad, export to Gerber and Excellon drill files.
- Import the Gerber and Excellon files into CopperCAM.
- Set up appropriate tool choices in CopperCAM, and export these directly the Roland's printer driver.
It should be easy to substitute Kicad for Eagle in the above. I am using Kicad purely because that is what I am familiar with.
CopperCAM is a very temperamental piece of software as regards importing Gerbers and drill files. Most of this page will be devoted to managing its eccentricities. It does, however, seem to output instructions that the Roland mill understands, with some restrictions that will be discussed below.
Export from Kicad
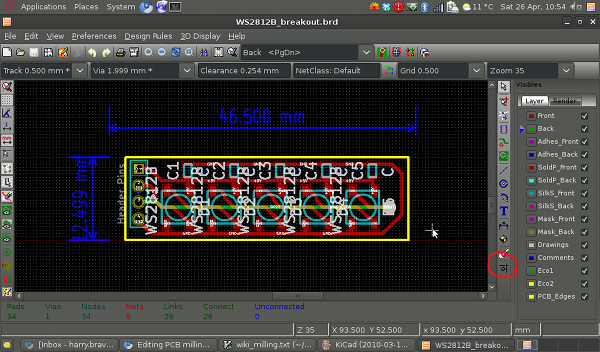
Download the example Kicad project from FIXME, open "WS2812B_breakout.pro" using Kicad, and then open the PCB editor. You should be faced with a routed board, all ready to be exported.
 [[
[[