Arduino and Cake
Contents
Arduino and Cake
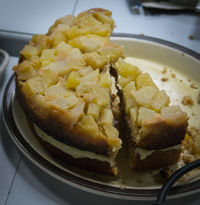
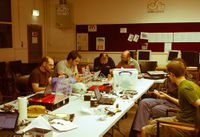
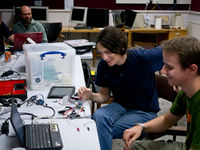
This is a page of information for the (hopefully) regular 'Arduino and Cake' event we run at Makespace. This is an evening where we get together in the space to learn and hack on projects involving the Arduino and similar microcontrollers. As the name suggests, there's also cake!
If you're a complete beginner to microcontrollers (tiny, very cheap computers without an operating system, files, display, keyboard...) this is a great opportunity to come and play with them. Experts also very welcome, in fact we need you to help the new people! Possible things you can do with an Arduino (a particularly easy to use microcontroller board) range from simple flashing lights up to acting as the brains of an autonomous flying robot, managing your hydroponic gardening project or tweeting the current temperature of your hot water tank. This get-together is intended to help those of us for whom imagination exceeds expertise (that is to say, pretty much everyone I know), let's build cool things together :)
Merger with Raspberry Pi and home automation group
Some time around 2015, the Arduino and Cake sessions stalled, and were subsumed into the Tuesday Raspberry Pi meetings.
New Sessions for 2014 - Return of the Cake
After almost a year we're back, more cake, more flashing lights, more robots, but with no more clue or organisational skills! There are four events scheduled, culminating in one just before our robot has to be ready for its competitive debut at the PiWars event on the 6th of December (anyone who'd like to join us with that robot challenge is more than welcome!).
Meetup pages for the events are as follows, all are 7pm to 10pm in the classroom:
- Wed 12th November
- Thu 20th November
- Fri 28th November
- Thu 4th December - Note change of date from Friday 5th!
Older Sessions
The plan is to have this as regularly as possible, varying the day around in case people can't make a particular day of the week.
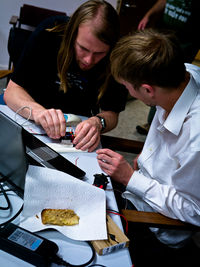
- Our first session, with all levels of experience from complete novices to expert embedded programmers. Everyone paired up, with beginners and experts working together; judging from the happy buzz of making noises (both the noise of making, and the making of noises - we had buzzers!) it worked pretty well. The meetup page for the first go is on meetup here
- The second one was on the 8th of August; meetup event here, big copies of the photos (which are lurking on the right hand side of this very page) here :) Some of the bits for the Big Box of Breakout Boards and Bits arrived, temperature and humidity sensors and stepper motor drivers yielded to sugar driven curiosity.
- The third was on the 16th August, slightly slower mostly as was distracted wiring cables but we made the dot matrix displays work (mostly) and Martin hacked some more on his sky tracking camera mount. Meetup event page here
- The fourth was on the 28th August, no robots as we had some issues with the new Arduinos (it turned out later that they didn't have bootloaders, now fixed). The meetup event was here
- The fith was in September 19th, meetup event was here
Next meeting is Friday 25th October. Meetup page here - sign up! Bring cake! Bring friends! (particularly friends with cake) Make bleepy flashing things that run around the room!
Helpful links
Arduino home page : www.arduino.cc
A bunch of useful little circuits to play with: Arduino Basic Connections
Big Box of Breakout Boards and Bits (BBBBB)
See Arduino/Raspberry Pi Accessories for more information
We've had approval to buy some bits and pieces for people to play with at this event, and generally within Makespace so I've done an eBay dive and ordered the following, these will arrive sometime over the next month or so:
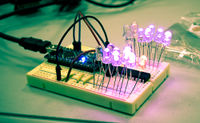
- 80 high brightness LEDs (20 each of orange, green, blue and pink!)
- 4 LED Dot matrix modules with drivers
- 2 Eight digit seven segment displays with drivers
- 2 Ethernet shields for the Arduino Nano
- 4 LCD 20x4 character displays
- 8 Motion sensors (6 degrees of freedom MPU6050 based with 3 axis gyro and 3 axis accelerometer)
- 6 Arduino Nano v3 boards (ATMega328, mounts on a breadboard)
- 12 Dual H-bridge modules, used to drive regular and stepper motors
- 3 Temperature / Relative humidity sensor modules
- 2 IR correlation sensor modules (the kind where you have a beam which outputs a signal when broken, good for detecting rotation etc)
- 10 Small servo motors (9g plastic type)
- 6 Ultrasonic rangefinder modules, detect bounce from around 20cm to 3m
- 4 Stepper motors with driver modules, 5v supply
- 1 Barometric pressure sensor module
- 10 Playstation style joysticks, the little analogue ones with a built in pushbutton on breakout boards
- 10 NRF24L01 radio modules, short (~100m) range radio modules capable of transmitting packets of 3 bytes at around 2Mbits/second under ideal conditions
- A lot of somewhat longer jumper leads (20cm and 30cm) both male to male and male to female, the latter being particularly useful for connecting to the radio modules as they have a non-breadboard-friendly pin layout (or we can make boards with the PCB mill)
Total budget for all the above including shipping is 270GBP (you get a lot of electronics for you money when buying from the far East!)
As and when these appear at my house I'll bring them in and add them to the BBBBB - I'm planning to buy a decent size box with compartments to keep these in, both as convenient access and as a way to monitor attrition (these are cheap, but the cheapness comes with long lead times). These bits will be for use at Makespace, rather than for consumption but as long as we have enough items we can be flexible on that; I think if someone has ordered a Nano, say, there's no reason we can't lend them one of the kit ones while they wait for it to turn up.
Update - we now have the box and some of the bits, I'm marking bits which have arrived and are now in the box in this colour in the list above. At the moment the box is waiting to be documented and have the components properly marked, it'll then be left in Makespace and hopefully its contents won't evaporate too fast!
Update 14th August 2013 - The BBBBB has its own wiki page at Arduino and Cake/Big Box where we'll try to document everything as it arrives. Add information to that page if you find something interesting about a part we have, it's also the place to put requests for components and modules.
Update 20th August 2013 - More bits have arrived, we're almost complete! The next session should result in robots, or I'll be severely displeased.
--tmo 10:22, 20 August 2013 (BST)
Projects
Got an interesting project or a project idea? Add it here.
Vehicle monitor / heating controller
I've re-wired my Land Rover, using a star topology, with a big central "ganglion" which almost all the wires run to and from. There's an extra wire coming from each connection, that will go to a board of LEDs and voltage dividers, the latter feeding into an Arduino Mega, which will monitor just about everything, and display information on a small LCD panel.
I'm also planning to make a motorized heater control system (moving flaps to direct air from an Eberspacher) and the valve motors will be driven from relays on the Arduino.
And there'll be a GPS/GSM security unit, and eventually a Linux board (probably Pandaboard) running navigation software. And later on, I hope, an electric motor to drive the extra axle I added. The Arduino Mega will route data between all these points, with its multiple hardware UARTS, as well as sending out information it converts locally from its own inputs.
I expect the software will be a main loop that polls all UARTs for incoming information, all wiring lines for changes from their previous state, all heating valve position sensors for whether they've reached the right position, all pedals for information to send to the traction motor controller when fitted, and does the associated actions (for example, NMEA sentences from the GPS get forwarded to the Linux board for navigation and are also used to display the time on the LCD, heating switches update the desired positions for flap valves).
JCGS 15:00, 2 August 2013 (BST)
Quadcopter
Because everyone loves autonomous flying robots surrounded by razor sharp rotating propellers, right?
A friend and I are working on a full self build of a quad rotor, we have the airframe, motors, props, speed controllers and an arduino with a combined gyro / accelerometer mounted. We just need to add batteries, wireless comms and software. I don't know whether I can persuade Si to come along to this meeting, he's not a member, but that's one of the things I'm playing with at the moment. I'm using the MPU6050 and PID libraries to manage the feedback between the accelerometer and the speed controllers in an attempt to get a stable hover mode, and the NRF24L01 as the radio module.
--tmo 15:12, 2 August 2013 (BST)
Bottle rocket telemetry
The family makers are making bottle rockets, I thought it'd be cool to try to make a telemetry module that would tell them how high they'd gone and render a 3d trace of the trajectory using either Processing or WebGL. The main challenge here is to get the circuitry small enough and tough enough to be carried by the rockets and then survive the return to ground level! The second issue is power, I have a LiPo battery and charger so should just be a case of a 3.3v regulator but maybe it needs a boost converter, not really my area of expertise so I'd really like some help there.
At the moment I'm interested in using an ATTiny85 (8 pin dip package MCU) as an Arduino, using the MPU6050 gyro / accelerometer and an XBee v2 radio - I'd use the NRF24 radio but I think it needs more pins than I have available on the ATTiny. Another option would be to use a rather more sophisticated Arduino pro mini, more pins means the NRF radio would be an option which is much cheaper than the XBee modules.
--tmo 15:12, 2 August 2013 (BST)
I2C plant moisture sensors
Program an ATTiny85 as an I2C slave, embedding it onto a circuit board etched to work as a capacitive moisture sensor. Use Arduino nano with ethernet shield as an I2C master to then monitor the moisture levels in my various outdoor plant pots and tweet when they're getting too dry.
--tmo 15:12, 2 August 2013 (BST)
Breadboard prototype of a 1D Pong Game
The idea is to prototype a simple 1D pong game (see YouTube) on Arduino or other microcontroller.
Features:
- Some kind of startup animation (similar to the YouTube video)
- A scoreboard or something similar. Based maybe on a segmented display or LCD.
- SOUNDS! :-)
- Perhaps some different game modes, maybe "powerups" of some kind?
Eventually I would like this to be the start of a MUCH larger version of the game (but that's for the future ;-))
--DannyG 15:12, 2 August 2013 (BST)
Self-levelling camera gimbal
One popular use of quadcopters is aerial photography/videography, but for this you ideally need a stabilised camera mounting. It's relatively easy to fabricate a two-axis gimbal for a small camera like a GoPro, driven by servos, which can hold itself level using readings from a gyro/accelerometer board.
Martin de S 12:25, 13 August 2013 (BST)
Barn door sky tracker
- Goal: take long exposure photos of the sky.
- Problem: the sky rotates over the course of a long exposure.
- Solution: make a motorised mount which rotates your camera at the same rate.
I'm aiming to build a simple "barn door" mount (http://en.wikipedia.org/wiki/Barn_door_tracker) to enable me to take long exposure sky photos. At its simplest this is two hinged pieces of wood connected by a threaded rod which you turn slowly to increase the angle at the hinge. I'd like to drive this with a stepper motor so it can be left running, and ideally let the Arduino do some of the maths to compensate for the changing geometry of the mount.
Martin de S 12:25, 13 August 2013 (BST)
Electricity monitor and TRIAC based resistive load driver
I need to modulate a large resistive heating load on AC with a TRIAC: whole cycle and half cycle burst fire with some supervisory decision making process to make it comply with the EMC directives. I also need to monitor the power delivered by integrating current and voltage over the waveform and integrating the lot. It would be useful to estimate the supply impedance and/or internal resistance of the load using the same hardware. A lot of this is similar to work done on the Open Energy Monitor by the Solar-PV folks trying to game the tax system - with added EMC directives...
markocosic 17:37, 21 August 2013 (BST)
Custom Arduino IDE Build
I'm working on a custom version of the Arduino IDE to, amongst other things, allow us to cut and paste code from the IDE directly into this wiki. I've made that particular change on my own clone of the code, the adventurous can check it out from https://github.com/tomoinn/Arduino/tree/ide-1.5.x; you'll need to do the following (only tested on linux thus far!)
> git clone git@github.com:tomoinn/Arduino.git
> git checkout ide-1.5.x
> cd Arduino/build
> ant run
You should then have a version of the IDE based on version 1.5 but with an extra context menu option 'copy as MediaWiki HTML', if you use this and then copy the clipboard into an editor in our wiki you should get something like the following:
/*
Blink
Turns on an LED on for one second, then off for one second, repeatedly.
This example code is in the public domain.
*/
// Pin 13 has an LED connected on most Arduino boards.
// give it a name:
int led = 13;
// the setup routine runs once when you press reset:
void setup() {
// initialize the digital pin as an output.
pinMode(led, OUTPUT);
}
// the loop routine runs over and over again forever:
void loop() {
digitalWrite(led, HIGH); // turn the LED on (HIGH is the voltage level)
delay(1000); // wait for a second
digitalWrite(led, LOW); // turn the LED off by making the voltage LOW
delay(1000); // wait for a second
}
Should make putting example code up easier - I'm also thinking of customizing colours, logo etc to create a makespace edition of the IDE. As and when it becomes a bit more stable I'll start doing proper builds for linux and windows at least. Note that cloning the github repository takes a long time, it's going on for 600Mb of data, potentially you can cut that down by only cloning the ide-1.5.x branch if you're familiar with git.
--tmo 14:09, 13 September 2013 (BST)
