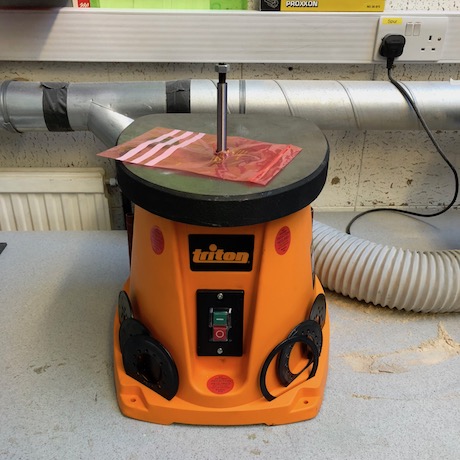
Equipment/Spindle Sander
Class Orange equipment: Only use if you are confident doing so. Training is available if not.
(More about equipment classes)
Contents
Summary
Owners
- Michael Dales
Trainers
- Michael Dales
Health and Safety
Sharp Object/material
- Power supply to be disconnected when changing sanders.
- Wait for all surfaces to stop moving before adjusting the tool.
Slips, Trips and Falls
- Waste material/offcuts to be kept clear of work area.
Fire
- Equipment will be checked for defects before each use to minimise the risk of possible electrical faults or fire.
- Carbon Dioxide extinguisher to be available for any electrical fires
- Do not use for sanding metal, as the resulting sparks can cause sawdust to ignite
Electric shock
- The equipment will be checked before each use to ensure that there are no defects in the casing, battery or cutting head.
Sight/Noise/Dust/Vibration
- P.P.E. to be worn when using the equipment.
- Regular brakes to prevent fingers becoming numb
Repetitive Action/Physical Fatigue
- Regular breaks if work is lasting more than 5 minutes in duration
Training
Training is required to use this machine. Please check on the Makespace meetup group for slots, or request one via the mailing list if there is not one currently scheduled.
Instructions
Please read the manual (linked below) before using the machine. Below is a summary of the same information, but lacking pictures.
Note: All of the Sanding Sleeves (11), except the smallest 13mm (1/2”) Sanding Sleeve fit over a matching Rubber Drum (12).
Note: Ensure there is no contact between the Sanding Sleeve and the Table Insert before turning the machine on.
- Fit the Lower Spindle Washer over the Spindle with the grooves facing upwards
- Select the correct Sanding Sleeve for the intended job. Select the corresponding Rubber Drum, (except when using the 13mm sanding sleeve)
- Select the appropriate Table Insert to match the rubber drum - there should be a few mm gap between the drum and the insert.
- Fit the Table Insert over the Spindle and onto the Lower Spindle Washer. Ensure the Table Insert is flush with the table
- Fit the Rubber Drum over the Spindle
- Slide the Sanding Sleeve over the Rubber Drum
- Fit the Upper Spindle Washer over the Spindle
- Use the large washer with the 75mm (3”), 51mm (2”), and 38mm (1 1/2”) Rubber Drums • Use the medium washer with the 26mm (1”) and 19mm (3/4”) Rubber Drums
- Use the small washer with the 13mm (1/2”) Sanding Sleeve
- Fit the Spindle Lock Nut (6) on the Spindle Tighten the nut just enough to expand the Rubber Drum against the Sanding Sleeve. Do not over-tighten
- When the sanding sleeve is completely worn it is possible to turn it upside down and maximise its service life by using the remaining grit
Note: If the sleeve rotates on the drum when switched on, the Spindle Lock Nut has not been sufficiently tightened to compress the drum and therefore grip the sleeve.
IMPORTANT: Do not use a sanding sleeve that is too worn. This can lead to excessive heat build-up and damage the rubber drum. Damaged rubber drums due to worn sanding sleeves will not be covered under warranty.
