Difference between revisions of "Equipment/Laser Cutter"
| (198 intermediate revisions by 34 users not shown) | |||
| Line 1: | Line 1: | ||
| − | |||
| − | + | {{RedTool}} | |
| − | [[ | + | [[Equipment|Equipment]] / Laser Cutter |
| − | + | '''Introduction''' | |
| − | + | The laser cutters are a great way to easily produce accurate and complex 2D forms in various materials, and can be designed for with limited experience in various drawing or CAD applications. At the same time, it is an expensive tool with real risk of injury and fire, so is very important you know how to use it to avoid damaging yourself and the machine. <br /> <br />'''You must only use the laser cutter if you have had the [https://web.makespace.org/training/ Makespace training], and if you are ever in any doubt about something, please ask for assistance.'''<br /><br /> | |
| − | + | ||
| − | + | ||
| − | + | We have two 60w CO2 Water Cooled Laser Cutters. Each has a working area of 900mm by 600mm. You can engrave and cut through materials such as wood, plastic, card, leather, fabrics, up to about 10-15mm thick (note, it can not cut metal). The laser cut is approximately 0.15mm wide, and a job can take a few seconds through to tens of minutes depending on material thickness and design complexity. | |
| − | + | We have dedicated PCs running LaserCut 5.3 software to import, prepare and download jobs to the Laser Cutter. It can import various formats, with DXF being the most commonly used, so various software packages can be used to create your designs. | |
== Instructions == | == Instructions == | ||
| − | = | + | ''' These instructions are not a substitute for this training, you must have completed the <span style="color:red">Makespace Laser Cutter Training</span> and have had your name added to the trained user list.''' |
| − | + | [[https://docs.google.com/presentation/d/1yM3OCXWbIayMMxw82Zjjc_xhthy-j0b86NiDUe0ccYw/edit#slide=id.p Laser Cutter Software Instructions from the classroom] | |
| − | * [http:// | + | |
| − | * [http:// | + | '''Power Up''' |
| − | * | + | |
| − | * | + | Give the machine a quick visual check. Make sure that there is nothing left on the bed, the water reservoir of the chiller looks normal, and that the equipment has no obvious damage or signs of being out-of-action. If the bed looks like it has residue on it, give it a wipe with IPA and a cloth. Before doing any job, the laser should be left to warm up for 4-5 mins. While the machine warms up, power on the adjacent PC and start the LaserCut application from the desktop. During this time the water temperature shown on the chiller should drop from ambient temperature to the usual setting of 18C. |
| + | |||
| + | '''Load your Design''' | ||
| + | |||
| + | The PC software has an import facility ('''file > import''') which seems to be happy taking AutoCAD 2004 DXF files and other formats. The workspace of the laser bed is represented as the work area in the LaserCut software. If the import doesn't do what you want size-wise, you can select the whole image and then use the 'size' command from the drop down menu to set the dimension you want. Clicking on the three dots ... symbol will adjust the other axis in the same proportion (keeping the aspect ratio fixed). Selecting the 'centre on bed' option will locate your imported drawing on the centre of the machine's cutting bed. <br> | ||
| + | <span style="color:red">'''The PC's now each have a PIN, which you can find on stickers the desk under the keyboard and on the wall near the top right of the computer screen'''.</span> | ||
| + | |||
| + | '''Prep''' | ||
| + | |||
| + | Select all (mouse-drag around all, or ctrl-a) and Tools -> Unite Lines. You always want to do this. Without it, many things won't work (will take longer, you'll get gaps, it won't do inner-before-outer, etching areas won't work, etc). | ||
| + | |||
| + | Make sure all your design fits within the bed. Even in immediate (relative) mode, you still need to do this. | ||
| + | |||
| + | '''LaserCut 5.3 tips'''<br> If you're stuck in "draw a box" mode, etc. you can right click and hit "pick" to get your pointer back | ||
| + | |||
| + | '''Assign Settings to Colours''' | ||
| + | |||
| + | Each part of your drawing that is assigned a different colour can have a different cut action assigned. Each colour will appear on the menu on the right hand side of the screen with numbers related to power and speed of the laser which will be used for the colour. | ||
| + | |||
| + | The main options are to Cut (line) or Engrave (raster fill). A marking on the material is a Cut. For each material and cutting depth required, a corresponding speed and power must be entered. The handbook provided with the machine gives suggested values for various materials but these should be considered as a starting point for a test. See the '''Power and Speed Settings''' section for our guidelines and experiences for these settings. | ||
| + | |||
| + | Parts are cut "inside out" within a colour, so if you have a hole cutout in a small piece you don't need to give this a separate colour. | ||
| + | |||
| + | '''Download to the Cutter''' | ||
| + | |||
| + | Your drawing will feature a blue dot which represents the starting point of the laser; this is by default on the top right corner (can be changed in the menu). In general, you will want to use "immediate" mode, which means this point represents wherever the laser is positioned when you start the job. You can also run the job in absolute mode by unchecking the box, making the job use absolute positioning on the workspace. | ||
| + | |||
| + | To download, select Download and Download Current; the download option will by default call the file on the laser cutter 'LASER'. | ||
| + | |||
| + | '''Set the Focus''' | ||
| + | |||
| + | Before each job, the focus needs to be checked and set by adjusting the height of the bed, and thus the work piece, from the lens. The critical dimension here is 41mm and several gauges made of perspex will be left around the machine. This gauge needs to be a fit between the top surface of the material you intend to cut and the white plastic 'flap' on the lens piece. The height of the table is adjusted using the UP and DOWN buttons. Failure to set the distance correctly will result in an out of focus laser and much bigger (but lower powered) cut line. Always ensure there is clearance between the material and laser head before the head moves. | ||
| + | |||
| + | '''Aligning and Testing the Job''' | ||
| + | |||
| + | The cutter's menu will show the most recent downloaded file highlighted. Pressing the 'test' button will make the head travel along the square maximum extends of the cuts. This shows you that you have the material in the right place, and you have enough of it! You can do this repeatedly, moving the work piece by hand or the laser head using the arrow keys (after hitting ESC), until you are confident you have things where you want them. | ||
| + | |||
| + | '''Cut the Job''' | ||
| + | |||
| + | When happy with the location of the material, close the lid and press 'start' to start the cutter. Watch the head and at least at first be prepared to press the 'stop' button immediately if you find you are burning massive holes in your work piece! This goes back to doing some tests on a sample of your material and making sure you are happy with the cut speeds and power you have selected. You should stay near the cutter at all times and be prepared to pause it or stop it in the event of fire. | ||
| + | |||
| + | <span style="color:red">'''DO NOT EVER LEAVE THE CUTTER UNATTENDED'''</span> | ||
| + | |||
| + | '''Finishing''' | ||
| + | |||
| + | The end of the job is signified by a beep. Waiting a few moments for the exhaust pump to clear any remaining smoke is a good idea, especially with wood, and will limit the build up of smells in the rest of the workshop. Remove your work piece, ensuring that all parts are cleared from the bed of the machine. | ||
| + | |||
| + | '''Power Down''' | ||
| + | |||
| + | The cutter is turned off using your fob. | ||
| + | |||
| + | '''Clean the bed of debris using the soft brush, then wipe down the bed using IPA and a cloth.''' | ||
| + | |||
| + | If you have been cutting particularly 'dirty' materials, most notably Ply which leaves a sticky residue then you will need WonderWipes and lots of 'elbow grease'. Residue on the bed can impact the next persons' job so please make the effort to clean up and leave the cutter as you would wish to find it. | ||
| + | |||
| + | Go away excited by what you can make and come back with lots more drawings! | ||
| + | |||
| + | == Can I cut it? == | ||
| + | |||
| + | If it's not on this list, the answer is "NO YOU CAN'T CUT IT AT MAKESPACE". Even if other people say it's ok. Bear in mind that we can't ventilate externally like other people can. | ||
| + | |||
| + | If it's something that isn't covered here, do ask on the forums and we'll look into it :) | ||
| + | |||
| + | *Woody things | ||
| + | ** Wood: yes! (be careful of fire) | ||
| + | ** Plywood: yes if it is "laser ply". Normal plywood has non-laser compatible glue | ||
| + | ** MDF: no. Clogs up our filters and smells bad. | ||
| + | ** LaserMDF: no. It produces perhaps 50% the gunk of MDF but still too much. | ||
| + | ** Cork: yes, but it with a badly charred edge, and won't cut very deeply --- try cutting from the back of your sheet and using the cut to guide a craft knife / scalpel to make a neat cut through to the front. | ||
| + | |||
| + | *Plasticy things | ||
| + | ** Acrylic / Perspex: yes! | ||
| + | ** PVC/Vinyl: absolutely not. Produces chlorine. | ||
| + | ** Silicone: we tried it with very limited success. A mm or two perhaps, anything else chars and doesn't cut. | ||
| + | ** White Delrin/Acetal: yes with great care. Make sure filters running well. Don't open lid too quickly. Check for fumes and fire. | ||
| + | ** Black Delrin/Acetal: no. contains carbon black which can be toxic. | ||
| + | ** Teflon: no (it is toxic) | ||
| + | ** Nylon: no (consult an owner) | ||
| + | ** Polythene/polyethylene: no (consult an owner) | ||
| + | ** Lexan/Polycarbonate: no (consult an owner) | ||
| + | ** Polypropylene: yes just. You must clean the bed. It will cut up to about 2mm. It's not a great quality cut, but just about doable. Fire risk. | ||
| + | ** GPPS / Polystyrene / HIPS in thin solid sheet form: maybe. ask owner to help. NO FOAM (it's highly flammable) | ||
| + | ** ABS: no (it's both toxic and messy - see [https://groups.google.com/g/cammakespace/c/M2Nr39bOeR8 : this thread]) | ||
| + | |||
| + | * Leathery things | ||
| + | ** Treated leather: no, because it releases formaldehyde (more details to follow) | ||
| + | ** bicast leather or pu leather (or bycast leather, or bi-cast leather): NO! It may contain vinyl, which is poisonous when cut with laser. See https://en.wikipedia.org/wiki/Bicast_leather. | ||
| + | ** Untreated leather: yes (more details to follow) | ||
| + | ** If unsure, don't cut it | ||
| + | |||
| + | *Papery things | ||
| + | ** Card/Paper: yes! (be careful of fire) | ||
| + | ** Tissue: yes if super super really careful (be REALLY careful of fire, have emergency procedure in place before you start) | ||
| + | |||
| + | *Metally things | ||
| + | ** Metal of any thickness doesn't cut. The surface can be engraved with a paint application. LMM6000 Surmark/Thermark has been tested and is suggested for use, but expensive. The owners suggest a speed of 800 and maximum power. | ||
| + | |||
| + | *Exotics | ||
| + | ** Fibre glass: no (unknown resin, glass particles) | ||
| + | ** Carbon Fibre: no | ||
| + | ** Slate: engravable for good effect | ||
| + | |||
| + | Very detailed cutting properties here: http://microfluidics.cnsi.ucsb.edu/tools/Trotec_laser_cutter/Synrad%20LaserProcessingGuide_Plastics.pdf | ||
| + | == Fixing strange issues == | ||
| + | |||
| + | * Etching doesn't work | ||
| + | ** Lines are not closed. LaserCut usually warns you about this. Ctrl-a to select all, then Tools->Unite Lines (0.001 should be fine). | ||
| + | ** Two copies on top of each other. Copies on top of each other "cancel out" any etching. Delete one copy. | ||
| + | ** Test with Menu->Laser->Simulate | ||
| + | |||
| + | * LaserCut will not download to the laser cutter | ||
| + | ** Check laser cutter isn't in a paused state | ||
| + | ** Restart LaserCut on the PC. (We've not had any usb issues nor needed to restart the laser since upgrading the PC summer 2014). | ||
| + | |||
| + | * Laser cuts things out 2+ times | ||
| + | ** Check you don't have two copies loaded on top of each other | ||
| + | ** Check it's not set to cut multiple times in LaserCut (this setting is right of the Cut/Engrave/Speed/Power settings) | ||
| + | ** Check the laser front panel says "001" at the bottom. If not, press right arrow until the number is highlighted, then down to adjust back to 1, then press return. | ||
| + | |||
| + | * Laser will only cut at the top right of the bed | ||
| + | ** Download again with Immediate Mode ticked | ||
| + | ** On laser panel, press return (I think?) then right twice (should select the bottom left option), then press return (I think). | ||
| + | |||
| + | *You Hit Emergency stop | ||
| + | ** E-M button needs twisting to re-activate | ||
| + | ** If that fails - check the circuit breaker inside. From the back of the machine, you want to open the lower flap on the left side, which should be unlocked. Near to the back, there is a breaker board. Flip the flippy bit. | ||
| + | |||
| + | == Material Stock == | ||
| + | For the stock we hold, please see the [[Equipment/Laser_Cutter_Stock|Laser cutter stock]] page. | ||
| + | |||
| + | == Owners == | ||
| + | |||
| + | The Owners are those who have volunteered to be in charge of the laser cutter. This includes organising maintenance, providing the mandatory practical training, responding to technical issues and generally being a point of contact. | ||
| + | |||
| + | The '''current Owners''' of the Laser Cutter are: | ||
| + | |||
| + | * Alaric W - Maintenance | ||
| + | *Adrian VDH - Maintenance | ||
| + | *Woolf - Trainer | ||
| + | |||
| + | *Brian S - Trainer | ||
| + | *Footleg - Trainer | ||
| + | *Will - Trainer | ||
| + | *Lorna - Trainer | ||
| + | |||
| + | If you have any questions, problems or concerns around the laser cutter Please fill out a trouble ticket on the PC, thanks. | ||
| + | |||
| + | For the old mailing list thread see here: | ||
| + | * [https://groups.google.com/d/topic/cammakespace/Tmce2iKVzD8/discussion Log : Laser Cutter] | ||
| + | |||
| + | == Getting Training == | ||
| + | |||
| + | Click here to get [https://web.makespace.org/training/ Makespace training] <br /> | ||
| + | |||
| + | Practical sessions (2nd part of training) are advertised on '''http://meetup.makespace.org''' | ||
| + | |||
| + | == Health and Safety == | ||
| + | |||
| + | The laser cutter is a potentially dangerous piece of equipment which must only be operated by members who have received appropriate training and who take due care. The top things to always remember when using the laser cutter are: | ||
| + | * '''ONLY USE THE LASER CUTTER IF YOU ARE ON THE LIST OF TRAINED USERS''' | ||
| + | * '''NEVER LEAVE THE LASER CUTTER RUNNING UNATTENDED''' | ||
| + | * '''KNOW WHAT TO DO IF A FIRE BREAKS OUT''' | ||
| + | * '''NEVER CUT MATERIALS THAT YOU DON'T KNOW ARE SAFE''' | ||
| + | |||
| + | As a trained user, you should be very aware of the following risks and how to deal with them: | ||
| + | |||
| + | '''FIRE (under normal operation)''' - Cutting at the wrong speed or the wrong power can result in the material igniting | ||
| + | * You must watch the cutter at all times and be prepared to abort the job if problems occur | ||
| + | * Small flashes of flame that don't hang around for a fraction of a second are acceptable, but any more is rare and not acceptable | ||
| + | * If a fire does take, this is the process you should follow (from minor to major): | ||
| + | ** Press "pause" (the same button you started the job with) - This will turn the laser off so no more heat enters, and assuming the flame goes out, you can press "start" for the job to continue where it left off | ||
| + | ** Open the lid - With the job paused, you can open the lid to blow out the flame. Again, it is possible to re-close the lid and continue where you left off | ||
| + | ** Move the material from under the laser head assuming safe to do so (so it doesn't damage the optics; alternatively send the laser to home/datum), and smother with a spare sheet of material or blow out | ||
| + | ** Use the workshop CO2 extinguisher to extinguish the flame | ||
| + | * You should also make a note in the log if any of this happens with associated materials and settings so we can keep track of any particular materials/settings we should look at | ||
| + | |||
| + | '''FIRE (abnormal operation)''' - If the head gets stuck or something else goes wrong, ignition could happen much more suddenly or intensely | ||
| + | * You must watch the cutter at all times and be prepared to abort the job if problems occur | ||
| + | * If the head gets trapped (e.g. tomb-stoning of a piece, mechanical failure) or any other problem occurs that causes or could cause fire, this is the process you should follow: | ||
| + | ** Hit the emergency stop | ||
| + | ** Open the lid and move the material from under the laser head assuming safe to do so (so it doesn't damage the optics) | ||
| + | ** Blow out, smother with a spare sheet of material, or use the CO2 extinguisher to extinguish the flame as appropriate | ||
| + | * Ensure a Maintainer looks at the machine before it is brought back in to action if it is not obvious what went wrong and all is ok | ||
| + | * You should also make a note in the log if any of this happens with associated materials and settings so we can keep track of any particular materials/settings we should look at | ||
| + | |||
| + | '''FUMES''' - The laser cutting process will release different smoke and fumes depending on the material. | ||
| + | * Never cut PVC or a material you are not sure is safe. When PVC is heated it releases chlorine gas, this mixes with the moisture in the air and the result is hydrochloric acid which is toxic to humans and corrosive to machines. | ||
| + | * Ensure the filter is on and the cutter lid stays closed for a while after a job to allow the fumes to clear. | ||
| + | * If you are feeling strange, think the fume build up is too much, or for any other reason you are unsure, stop the job. | ||
| + | |||
| + | '''TRAPPING''' - The head and bed of the cutter can be moved by the front panel menu or programs in the machines memory. | ||
| + | * Be careful when working inside the cutting area or with the lid open not to trap hands, hair, clothing or anything else. | ||
| + | * Always check the machine for unexpected items that may have fallen in before closing the lid. | ||
| + | * Do not attempt to climb into the machine! | ||
| + | |||
| + | '''LASER BURNS/LIGHT''' - A 60W laser can do real damage. | ||
| + | * The laser should be safe within the confines of the machine, and cut-off automatically when the lid is open (although this should not be relied upon). The top window is safe to look through during a job, but do not attempt to interfere with these windows or the laser or in any way invent some way to look at the laser. | ||
| + | * Do not tamper with the laser cutter, or any interlocks. All side panels of the laser should always be closed and locked whilst the machine is plugged in. | ||
| + | * Do not put metal in the laser cutter. | ||
| + | |||
| + | == Power and Speed Settings == | ||
| + | |||
| + | In due time we will try to build up a large sample stock of materials and record the values which work best. Here are the sample material tests we have so far: | ||
| + | |||
| + | <gallery> | ||
| + | File:Laser-schmoo-3mm-acrylic.JPG|3mm Acrylic | ||
| + | File:Laser-schmoo-10mm-acrylic.JPG|10mm Acrylic | ||
| + | File:Laser-schmoo-9mm-mdf.JPG|9mm MDF (note: do not cut MDF - see above!) | ||
| + | </gallery> | ||
| + | |||
| + | Settings to get you started: | ||
| + | *3mm Acrylic: Speed 12, Power 100, Corner power 100 | ||
| + | *5mm Acrylic: Speed 6, Power 100, Corner power 100 | ||
| + | *Acrylic shallow cut: Speed 30, power 50, corner power 50 | ||
| + | *Etching acrylic: Speed 400, Power 50, Spacing 0.05 | ||
| + | |||
| + | To make your own material test, a test grid can be downloaded here: [[Media:Test grid.zip]] | ||
| + | |||
| + | *3mm Delrin: Speed 10, Power 100, Corner power 100 | ||
| + | *5mm Delrin: Speed 4, Power 100, Corner power 100 | ||
| + | *6mm Delrin: speed 3, Power 100, Corner power 100 | ||
| + | |||
| + | === Test sheet === | ||
| + | |||
| + | One member designed this test sheet: [[Media:Laser_cutter_test_sheet.pdf]] | ||
| + | |||
| + | The LaserCut software has too few colours for all the settings, so if you want to cut again, you need to assign settings by batches, e.g. by assigning all items to the colour black, turning off that colour ("Output" checkbox unchecked), and giving the squares one colour at a time with the right settings. | ||
| + | |||
| + | == Tips & Tricks == | ||
| + | |||
| + | * If the laser cutter's user interface does not seem to respond/do what you want, hit "ESC" to return to 'normal mode'. | ||
| + | * The opaque white acrylic needs slightly stronger settings for surface cuts as they are not as visible as in the transparent acrylic (i.e., for similar effect you need a deeper cut). Otherwise seems to cut equivalently to transparent acrylics. | ||
| + | * If you want a tight fit of pieces or very accurate sizing, keep in mind that the laser beam has a width of just over 0.1 mm (maybe 0.11 or 0.12 mm). So all exterior cut lines should be offset by 0.05 mm; you can do this very easily in the LaserCutter Software with the "Offset" tool (units are in mm, so enter '0.05' and select 'Outer'). | ||
| + | * The DXF file format stores values only (not values and units). The internal units in the LaserCutter are in mm. If you set your document's units to mm in the exporting CAD system it should work fine, but generally it is a good idea to have a piece of geometry of known length, e.g. a line 100mm long, or a box of known size around your design. This makes adjusting the scaling a lot easier. | ||
| + | * If you want to export a DXF from Inkscape (which is a great, free vector drawing package), then make sure you do "Object to path" from the Path menu for the whole object and then during the export stage, untick both options for type of export. Choose mm as your unit. | ||
| + | * There's now a page to help with Inkscape and our laser at [[Equipment/Laser_Cutter_Inkscape]] | ||
| + | * If the jog buttons (arrow keys moving the laser head around) are only moving the head in small single steps rather than moving it continuously, make sure that the jog step size is set to 0.0mm in the Jog Settings section of the menu. | ||
| + | |||
| + | === Material Usage === | ||
| + | You want to use as little material as possible to save money, we want you to use as little material as possible to reduce re-stocking burden and wastage. | ||
| + | There's a neat tool you can use for packing SVG files into small spaces, find it here: http://svgnest.com/ | ||
| + | |||
| + | == Fixing up a job that went wrong == | ||
| + | |||
| + | If you messed up a job and, for example, some cut lines weren't cut, you might try to run the job again after recolouring all of the lines except the ones that didn't cut. You can then deselect those lines for output in the Cut/Engrave window on the top right of the Lasercut Interface, and this will keep your positioning. | ||
| + | |||
| + | If your head has moved, you can try setting some lines to power 1, which should not cut anything, but allows you to see where the head is travelling. | ||
| + | |||
| + | = Maintenance = | ||
| + | |||
| + | The maintenance of the Laser Cutter is carried out by the Owners, with some basic maintenance being carried out by Users on every job. | ||
| + | |||
| + | == Maintenance Schedule == | ||
| + | |||
| + | Continuous Maintenance ('''Every job, done by all Laser Cutter Users''') | ||
| + | * Clean the laser bed with IPA and cloth or Swarfega wipes | ||
| + | * Clean any debris off laser bed and surround using soft brush | ||
| + | |||
| + | Basic Maintenance (Every week, done by Laser Cutter Maintainers) | ||
| + | * Clean the laser lens with IPA and cotton buds | ||
| + | * Oil the 3 runners with 3-in-one light oil | ||
| + | * Thoroughly clean the laser bed with IPA and cloth | ||
| + | * Check the water level in the cooling tank | ||
| + | * Clean and remove debris from the machine base and catchment drawer | ||
| + | |||
| + | Full Maintenance (Every 4 weeks, done by Laser Cutter Maintainers) | ||
| + | * Check the water is clean in the cooling tank (i.e. no contamination/organic build up) | ||
| + | * Check filter unit for filter renewal | ||
| + | * Oil the 4 rise and fall lead screws with 3-in-one light oil | ||
| + | * Check mirrors and clean with a disposable sachet lens cleaner cloth (only if needed, mirror coatings are delicate) | ||
| + | * Work through mirror alignment procedure to check alignment of mirrors | ||
| + | |||
| + | == Repairs == | ||
| + | |||
| + | We expect to have to change the following parts for general maintenance: | ||
| + | * The laser tube (guess every 6-12 months) | ||
| + | * The filter (guess every 3-6 months) | ||
| + | * The optics (guess every 6-12 months) | ||
Maintenance and Spares: | Maintenance and Spares: | ||
| Line 30: | Line 304: | ||
* Estimate for Call Out (£200.00) | * Estimate for Call Out (£200.00) | ||
| − | + | == Maintenance Shopping List == | |
| − | + | * 3-in-one light oil | |
| − | * | + | * Cotton Buds |
| − | * | + | * Lens cleaner sachets |
| − | * | + | * Soft paint/cleaning brush |
| − | * | + | * Thermometer for water tank |
| − | * | + | * Hand held CO2 extinguisher |
| − | + | ||
| − | * | + | |
| − | + | ||
| − | + | ||
| − | + | = Further Information = | |
| − | + | * [http://hpclaser.co.uk/index.php?main_page=product_info&cPath=1&products_id=11 LS 6090 PRO Laser Product Page] | |
| + | * [http://hpclaser.co.uk/index.php?main_page=page&id=5&chapter=2 HPCLaser Technical Info] | ||
| + | * [http://www.laserscript.co.uk/phpBB3/ Laserscript Forum] | ||
| − | + | LaserCut 5.3 | |
| − | + | * [http://www.leetro.com/english/sale/35.html Homepage] | |
| + | * [http://www.leetro.com/english/down/LaserCut5.3%20Manual%20V1.6.pdf Manual] | ||
| − | + | [[BitmapLaserEngraving]] | |
| − | + | == Installation == | |
| − | + | ||
| − | + | ||
| − | + | ||
| − | + | ||
| − | + | ||
| − | + | <gallery> | |
| + | File:Laser_-_van.JPG | ||
| + | File:Makespace-laser-install-02.JPG | ||
| + | File:Laser_-_building_2.JPG | ||
| + | File:Laser_-_building.JPG | ||
| + | </gallery> | ||
| − | + | == Purchase == | |
| − | + | Full Purchase, Delivery and Installation (£6865.00+vat = £8238.00) | |
| − | + | * [http://hpclaser.co.uk/index.php?main_page=product_info&cPath=1&products_id=11 LS 6090 PRO Laser engraving and cutting machine, 600mm by 900mm 60W] (£5250.00+vat) | |
| − | + | * [http://hpclaser.co.uk/index.php?main_page=product_info&cPath=2&products_id=34 Laser Fume Filter] (£1250.00+vat) | |
| − | + | * Delivery (£190+vat) | |
| − | + | * Installation/Training (£175+vat) | |
| − | + | ||
| − | + | ||
| − | + | ||
| − | + | ||
| − | + | ||
| − | + | ||
| − | + | ||
| − | + | Here are some examples of laser jobs we've run (please add a photo of yours any time you do a job!) | |
| − | + | <gallery> | |
| + | File:Laser-cut-focus-tool.JPG | ||
| + | File:Laser-cut-front-panels.JPG | ||
| + | File:Laser-cut-lizards.JPG | ||
| + | File:Laser-cut-m-and-s.JPG | ||
| + | File:Laser-cut-model-building.JPG | ||
| + | File:Laser-cut-ply-m.JPG | ||
| + | File:Laser_output_-_makespace_arrow.JPG | ||
| + | File:Laser_box.jpg | ||
| + | File:Croc-small.jpg | ||
| + | File:LaserCutter_Jobs_1.jpg | ||
| + | File:LaserCutterGallery_20130328.jpg | ||
| + | File:LasercutSettlers.jpg | ||
| + | File:Wolfstock1.jpg | ||
| + | File:Mug-holder.jpg | ||
| + | File:2013-10-21 20.10.06.jpg | ||
| + | File:Indy jigster.png | ||
| + | </gallery> | ||
Latest revision as of 17:36, 20 February 2022
Class Red equipment: Do not use without specific training.
(More about equipment classes)
Introduction
The laser cutters are a great way to easily produce accurate and complex 2D forms in various materials, and can be designed for with limited experience in various drawing or CAD applications. At the same time, it is an expensive tool with real risk of injury and fire, so is very important you know how to use it to avoid damaging yourself and the machine.
You must only use the laser cutter if you have had the Makespace training, and if you are ever in any doubt about something, please ask for assistance.
We have two 60w CO2 Water Cooled Laser Cutters. Each has a working area of 900mm by 600mm. You can engrave and cut through materials such as wood, plastic, card, leather, fabrics, up to about 10-15mm thick (note, it can not cut metal). The laser cut is approximately 0.15mm wide, and a job can take a few seconds through to tens of minutes depending on material thickness and design complexity.
We have dedicated PCs running LaserCut 5.3 software to import, prepare and download jobs to the Laser Cutter. It can import various formats, with DXF being the most commonly used, so various software packages can be used to create your designs.
Contents
Instructions
These instructions are not a substitute for this training, you must have completed the Makespace Laser Cutter Training and have had your name added to the trained user list.
[Laser Cutter Software Instructions from the classroom
Power Up
Give the machine a quick visual check. Make sure that there is nothing left on the bed, the water reservoir of the chiller looks normal, and that the equipment has no obvious damage or signs of being out-of-action. If the bed looks like it has residue on it, give it a wipe with IPA and a cloth. Before doing any job, the laser should be left to warm up for 4-5 mins. While the machine warms up, power on the adjacent PC and start the LaserCut application from the desktop. During this time the water temperature shown on the chiller should drop from ambient temperature to the usual setting of 18C.
Load your Design
The PC software has an import facility (file > import) which seems to be happy taking AutoCAD 2004 DXF files and other formats. The workspace of the laser bed is represented as the work area in the LaserCut software. If the import doesn't do what you want size-wise, you can select the whole image and then use the 'size' command from the drop down menu to set the dimension you want. Clicking on the three dots ... symbol will adjust the other axis in the same proportion (keeping the aspect ratio fixed). Selecting the 'centre on bed' option will locate your imported drawing on the centre of the machine's cutting bed.
The PC's now each have a PIN, which you can find on stickers the desk under the keyboard and on the wall near the top right of the computer screen.
Prep
Select all (mouse-drag around all, or ctrl-a) and Tools -> Unite Lines. You always want to do this. Without it, many things won't work (will take longer, you'll get gaps, it won't do inner-before-outer, etching areas won't work, etc).
Make sure all your design fits within the bed. Even in immediate (relative) mode, you still need to do this.
LaserCut 5.3 tips
If you're stuck in "draw a box" mode, etc. you can right click and hit "pick" to get your pointer back
Assign Settings to Colours
Each part of your drawing that is assigned a different colour can have a different cut action assigned. Each colour will appear on the menu on the right hand side of the screen with numbers related to power and speed of the laser which will be used for the colour.
The main options are to Cut (line) or Engrave (raster fill). A marking on the material is a Cut. For each material and cutting depth required, a corresponding speed and power must be entered. The handbook provided with the machine gives suggested values for various materials but these should be considered as a starting point for a test. See the Power and Speed Settings section for our guidelines and experiences for these settings.
Parts are cut "inside out" within a colour, so if you have a hole cutout in a small piece you don't need to give this a separate colour.
Download to the Cutter
Your drawing will feature a blue dot which represents the starting point of the laser; this is by default on the top right corner (can be changed in the menu). In general, you will want to use "immediate" mode, which means this point represents wherever the laser is positioned when you start the job. You can also run the job in absolute mode by unchecking the box, making the job use absolute positioning on the workspace.
To download, select Download and Download Current; the download option will by default call the file on the laser cutter 'LASER'.
Set the Focus
Before each job, the focus needs to be checked and set by adjusting the height of the bed, and thus the work piece, from the lens. The critical dimension here is 41mm and several gauges made of perspex will be left around the machine. This gauge needs to be a fit between the top surface of the material you intend to cut and the white plastic 'flap' on the lens piece. The height of the table is adjusted using the UP and DOWN buttons. Failure to set the distance correctly will result in an out of focus laser and much bigger (but lower powered) cut line. Always ensure there is clearance between the material and laser head before the head moves.
Aligning and Testing the Job
The cutter's menu will show the most recent downloaded file highlighted. Pressing the 'test' button will make the head travel along the square maximum extends of the cuts. This shows you that you have the material in the right place, and you have enough of it! You can do this repeatedly, moving the work piece by hand or the laser head using the arrow keys (after hitting ESC), until you are confident you have things where you want them.
Cut the Job
When happy with the location of the material, close the lid and press 'start' to start the cutter. Watch the head and at least at first be prepared to press the 'stop' button immediately if you find you are burning massive holes in your work piece! This goes back to doing some tests on a sample of your material and making sure you are happy with the cut speeds and power you have selected. You should stay near the cutter at all times and be prepared to pause it or stop it in the event of fire.
DO NOT EVER LEAVE THE CUTTER UNATTENDED
Finishing
The end of the job is signified by a beep. Waiting a few moments for the exhaust pump to clear any remaining smoke is a good idea, especially with wood, and will limit the build up of smells in the rest of the workshop. Remove your work piece, ensuring that all parts are cleared from the bed of the machine.
Power Down
The cutter is turned off using your fob.
Clean the bed of debris using the soft brush, then wipe down the bed using IPA and a cloth.
If you have been cutting particularly 'dirty' materials, most notably Ply which leaves a sticky residue then you will need WonderWipes and lots of 'elbow grease'. Residue on the bed can impact the next persons' job so please make the effort to clean up and leave the cutter as you would wish to find it.
Go away excited by what you can make and come back with lots more drawings!
Can I cut it?
If it's not on this list, the answer is "NO YOU CAN'T CUT IT AT MAKESPACE". Even if other people say it's ok. Bear in mind that we can't ventilate externally like other people can.
If it's something that isn't covered here, do ask on the forums and we'll look into it :)
- Woody things
- Wood: yes! (be careful of fire)
- Plywood: yes if it is "laser ply". Normal plywood has non-laser compatible glue
- MDF: no. Clogs up our filters and smells bad.
- LaserMDF: no. It produces perhaps 50% the gunk of MDF but still too much.
- Cork: yes, but it with a badly charred edge, and won't cut very deeply --- try cutting from the back of your sheet and using the cut to guide a craft knife / scalpel to make a neat cut through to the front.
- Plasticy things
- Acrylic / Perspex: yes!
- PVC/Vinyl: absolutely not. Produces chlorine.
- Silicone: we tried it with very limited success. A mm or two perhaps, anything else chars and doesn't cut.
- White Delrin/Acetal: yes with great care. Make sure filters running well. Don't open lid too quickly. Check for fumes and fire.
- Black Delrin/Acetal: no. contains carbon black which can be toxic.
- Teflon: no (it is toxic)
- Nylon: no (consult an owner)
- Polythene/polyethylene: no (consult an owner)
- Lexan/Polycarbonate: no (consult an owner)
- Polypropylene: yes just. You must clean the bed. It will cut up to about 2mm. It's not a great quality cut, but just about doable. Fire risk.
- GPPS / Polystyrene / HIPS in thin solid sheet form: maybe. ask owner to help. NO FOAM (it's highly flammable)
- ABS: no (it's both toxic and messy - see : this thread)
- Leathery things
- Treated leather: no, because it releases formaldehyde (more details to follow)
- bicast leather or pu leather (or bycast leather, or bi-cast leather): NO! It may contain vinyl, which is poisonous when cut with laser. See https://en.wikipedia.org/wiki/Bicast_leather.
- Untreated leather: yes (more details to follow)
- If unsure, don't cut it
- Papery things
- Card/Paper: yes! (be careful of fire)
- Tissue: yes if super super really careful (be REALLY careful of fire, have emergency procedure in place before you start)
- Metally things
- Metal of any thickness doesn't cut. The surface can be engraved with a paint application. LMM6000 Surmark/Thermark has been tested and is suggested for use, but expensive. The owners suggest a speed of 800 and maximum power.
- Exotics
- Fibre glass: no (unknown resin, glass particles)
- Carbon Fibre: no
- Slate: engravable for good effect
Very detailed cutting properties here: http://microfluidics.cnsi.ucsb.edu/tools/Trotec_laser_cutter/Synrad%20LaserProcessingGuide_Plastics.pdf
Fixing strange issues
- Etching doesn't work
- Lines are not closed. LaserCut usually warns you about this. Ctrl-a to select all, then Tools->Unite Lines (0.001 should be fine).
- Two copies on top of each other. Copies on top of each other "cancel out" any etching. Delete one copy.
- Test with Menu->Laser->Simulate
- LaserCut will not download to the laser cutter
- Check laser cutter isn't in a paused state
- Restart LaserCut on the PC. (We've not had any usb issues nor needed to restart the laser since upgrading the PC summer 2014).
- Laser cuts things out 2+ times
- Check you don't have two copies loaded on top of each other
- Check it's not set to cut multiple times in LaserCut (this setting is right of the Cut/Engrave/Speed/Power settings)
- Check the laser front panel says "001" at the bottom. If not, press right arrow until the number is highlighted, then down to adjust back to 1, then press return.
- Laser will only cut at the top right of the bed
- Download again with Immediate Mode ticked
- On laser panel, press return (I think?) then right twice (should select the bottom left option), then press return (I think).
- You Hit Emergency stop
- E-M button needs twisting to re-activate
- If that fails - check the circuit breaker inside. From the back of the machine, you want to open the lower flap on the left side, which should be unlocked. Near to the back, there is a breaker board. Flip the flippy bit.
Material Stock
For the stock we hold, please see the Laser cutter stock page.
Owners
The Owners are those who have volunteered to be in charge of the laser cutter. This includes organising maintenance, providing the mandatory practical training, responding to technical issues and generally being a point of contact.
The current Owners of the Laser Cutter are:
- Alaric W - Maintenance
- Adrian VDH - Maintenance
- Woolf - Trainer
- Brian S - Trainer
- Footleg - Trainer
- Will - Trainer
- Lorna - Trainer
If you have any questions, problems or concerns around the laser cutter Please fill out a trouble ticket on the PC, thanks.
For the old mailing list thread see here:
Getting Training
Click here to get Makespace training
Practical sessions (2nd part of training) are advertised on http://meetup.makespace.org
Health and Safety
The laser cutter is a potentially dangerous piece of equipment which must only be operated by members who have received appropriate training and who take due care. The top things to always remember when using the laser cutter are:
- ONLY USE THE LASER CUTTER IF YOU ARE ON THE LIST OF TRAINED USERS
- NEVER LEAVE THE LASER CUTTER RUNNING UNATTENDED
- KNOW WHAT TO DO IF A FIRE BREAKS OUT
- NEVER CUT MATERIALS THAT YOU DON'T KNOW ARE SAFE
As a trained user, you should be very aware of the following risks and how to deal with them:
FIRE (under normal operation) - Cutting at the wrong speed or the wrong power can result in the material igniting
- You must watch the cutter at all times and be prepared to abort the job if problems occur
- Small flashes of flame that don't hang around for a fraction of a second are acceptable, but any more is rare and not acceptable
- If a fire does take, this is the process you should follow (from minor to major):
- Press "pause" (the same button you started the job with) - This will turn the laser off so no more heat enters, and assuming the flame goes out, you can press "start" for the job to continue where it left off
- Open the lid - With the job paused, you can open the lid to blow out the flame. Again, it is possible to re-close the lid and continue where you left off
- Move the material from under the laser head assuming safe to do so (so it doesn't damage the optics; alternatively send the laser to home/datum), and smother with a spare sheet of material or blow out
- Use the workshop CO2 extinguisher to extinguish the flame
- You should also make a note in the log if any of this happens with associated materials and settings so we can keep track of any particular materials/settings we should look at
FIRE (abnormal operation) - If the head gets stuck or something else goes wrong, ignition could happen much more suddenly or intensely
- You must watch the cutter at all times and be prepared to abort the job if problems occur
- If the head gets trapped (e.g. tomb-stoning of a piece, mechanical failure) or any other problem occurs that causes or could cause fire, this is the process you should follow:
- Hit the emergency stop
- Open the lid and move the material from under the laser head assuming safe to do so (so it doesn't damage the optics)
- Blow out, smother with a spare sheet of material, or use the CO2 extinguisher to extinguish the flame as appropriate
- Ensure a Maintainer looks at the machine before it is brought back in to action if it is not obvious what went wrong and all is ok
- You should also make a note in the log if any of this happens with associated materials and settings so we can keep track of any particular materials/settings we should look at
FUMES - The laser cutting process will release different smoke and fumes depending on the material.
- Never cut PVC or a material you are not sure is safe. When PVC is heated it releases chlorine gas, this mixes with the moisture in the air and the result is hydrochloric acid which is toxic to humans and corrosive to machines.
- Ensure the filter is on and the cutter lid stays closed for a while after a job to allow the fumes to clear.
- If you are feeling strange, think the fume build up is too much, or for any other reason you are unsure, stop the job.
TRAPPING - The head and bed of the cutter can be moved by the front panel menu or programs in the machines memory.
- Be careful when working inside the cutting area or with the lid open not to trap hands, hair, clothing or anything else.
- Always check the machine for unexpected items that may have fallen in before closing the lid.
- Do not attempt to climb into the machine!
LASER BURNS/LIGHT - A 60W laser can do real damage.
- The laser should be safe within the confines of the machine, and cut-off automatically when the lid is open (although this should not be relied upon). The top window is safe to look through during a job, but do not attempt to interfere with these windows or the laser or in any way invent some way to look at the laser.
- Do not tamper with the laser cutter, or any interlocks. All side panels of the laser should always be closed and locked whilst the machine is plugged in.
- Do not put metal in the laser cutter.
Power and Speed Settings
In due time we will try to build up a large sample stock of materials and record the values which work best. Here are the sample material tests we have so far:
3mm Acrylic

10mm Acrylic
9mm MDF (note: do not cut MDF - see above!)


Settings to get you started:
- 3mm Acrylic: Speed 12, Power 100, Corner power 100
- 5mm Acrylic: Speed 6, Power 100, Corner power 100
- Acrylic shallow cut: Speed 30, power 50, corner power 50
- Etching acrylic: Speed 400, Power 50, Spacing 0.05
To make your own material test, a test grid can be downloaded here: Media:Test grid.zip
- 3mm Delrin: Speed 10, Power 100, Corner power 100
- 5mm Delrin: Speed 4, Power 100, Corner power 100
- 6mm Delrin: speed 3, Power 100, Corner power 100
Test sheet
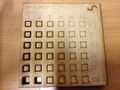
One member designed this test sheet: Media:Laser_cutter_test_sheet.pdf
The LaserCut software has too few colours for all the settings, so if you want to cut again, you need to assign settings by batches, e.g. by assigning all items to the colour black, turning off that colour ("Output" checkbox unchecked), and giving the squares one colour at a time with the right settings.
Tips & Tricks
- If the laser cutter's user interface does not seem to respond/do what you want, hit "ESC" to return to 'normal mode'.
- The opaque white acrylic needs slightly stronger settings for surface cuts as they are not as visible as in the transparent acrylic (i.e., for similar effect you need a deeper cut). Otherwise seems to cut equivalently to transparent acrylics.
- If you want a tight fit of pieces or very accurate sizing, keep in mind that the laser beam has a width of just over 0.1 mm (maybe 0.11 or 0.12 mm). So all exterior cut lines should be offset by 0.05 mm; you can do this very easily in the LaserCutter Software with the "Offset" tool (units are in mm, so enter '0.05' and select 'Outer').
- The DXF file format stores values only (not values and units). The internal units in the LaserCutter are in mm. If you set your document's units to mm in the exporting CAD system it should work fine, but generally it is a good idea to have a piece of geometry of known length, e.g. a line 100mm long, or a box of known size around your design. This makes adjusting the scaling a lot easier.
- If you want to export a DXF from Inkscape (which is a great, free vector drawing package), then make sure you do "Object to path" from the Path menu for the whole object and then during the export stage, untick both options for type of export. Choose mm as your unit.
- There's now a page to help with Inkscape and our laser at Equipment/Laser_Cutter_Inkscape
- If the jog buttons (arrow keys moving the laser head around) are only moving the head in small single steps rather than moving it continuously, make sure that the jog step size is set to 0.0mm in the Jog Settings section of the menu.
Material Usage
You want to use as little material as possible to save money, we want you to use as little material as possible to reduce re-stocking burden and wastage. There's a neat tool you can use for packing SVG files into small spaces, find it here: http://svgnest.com/
Fixing up a job that went wrong
If you messed up a job and, for example, some cut lines weren't cut, you might try to run the job again after recolouring all of the lines except the ones that didn't cut. You can then deselect those lines for output in the Cut/Engrave window on the top right of the Lasercut Interface, and this will keep your positioning.
If your head has moved, you can try setting some lines to power 1, which should not cut anything, but allows you to see where the head is travelling.
Maintenance
The maintenance of the Laser Cutter is carried out by the Owners, with some basic maintenance being carried out by Users on every job.
Maintenance Schedule
Continuous Maintenance (Every job, done by all Laser Cutter Users)
- Clean the laser bed with IPA and cloth or Swarfega wipes
- Clean any debris off laser bed and surround using soft brush
Basic Maintenance (Every week, done by Laser Cutter Maintainers)
- Clean the laser lens with IPA and cotton buds
- Oil the 3 runners with 3-in-one light oil
- Thoroughly clean the laser bed with IPA and cloth
- Check the water level in the cooling tank
- Clean and remove debris from the machine base and catchment drawer
Full Maintenance (Every 4 weeks, done by Laser Cutter Maintainers)
- Check the water is clean in the cooling tank (i.e. no contamination/organic build up)
- Check filter unit for filter renewal
- Oil the 4 rise and fall lead screws with 3-in-one light oil
- Check mirrors and clean with a disposable sachet lens cleaner cloth (only if needed, mirror coatings are delicate)
- Work through mirror alignment procedure to check alignment of mirrors
Repairs
We expect to have to change the following parts for general maintenance:
- The laser tube (guess every 6-12 months)
- The filter (guess every 3-6 months)
- The optics (guess every 6-12 months)
Maintenance and Spares:
- 60 watt C02 laser tube (£275.00+vat)
- 50 mm Focus Meniscus Lens (£75.00+vat)
- Estimate for Call Out (£200.00)
Maintenance Shopping List
- 3-in-one light oil
- Cotton Buds
- Lens cleaner sachets
- Soft paint/cleaning brush
- Thermometer for water tank
- Hand held CO2 extinguisher
Further Information
LaserCut 5.3
Installation


Purchase
Full Purchase, Delivery and Installation (£6865.00+vat = £8238.00)
- LS 6090 PRO Laser engraving and cutting machine, 600mm by 900mm 60W (£5250.00+vat)
- Laser Fume Filter (£1250.00+vat)
- Delivery (£190+vat)
- Installation/Training (£175+vat)
Here are some examples of laser jobs we've run (please add a photo of yours any time you do a job!)


